A while back I showed you a frame I had done in a rusty finish using Modern Masters Metal Effects rust finish products, and I told you how the views of my post were solely my own and that Modern Masters had no idea who I even was let alone that they would compensate me to promote their products. No one was more shocked than me when I received an email from them and an offer to receive some of their product to try out on my blog. So I will disclose that this product was supplied to me by Modern Masters but the views of their product are my own.
I did three projects simultaneously with the Metal Effects rust finish so don't let my photos confuse you. I'll show you the angel I did this week as well. You can see her in my tutorial photos.
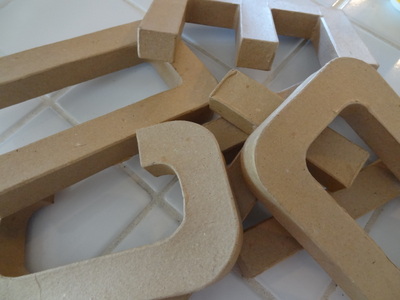
All of us crafters have seen these paper letters. Our Joann's carries them in a lot of sizes and these that I found at a yard sale are about eight inches tall.
My first step was to use the Metal Effects primer and I gave my projects two coats. Do the first coat, wait 30 minutes and then do the second coat. The directions said to let the primer dry for 12 hours but I let it dry for 24 hours. Please excuse the mess in the background. I am purging and sorting my entire house right now and things will be worse before they get better. That will also be the subject of a blog post this week so stay tuned.
After waiting 24 hours for the primer coat to dry, I applied two coats of the Metal Effects iron paint. I allowed and hour in between each coat.
I let that totally dry for about six hours and then coated my letters with the Metal Effects rust activator. For the letters I used a sponge applicator and laid the letters flat. You can spritz the rust activator on, but I wanted a heavier coat and I laid the letters flat so there would be no run off. For this step, apply the rust activator, wait five minutes and reapply. Then just sit back and watch the magic begin. It takes a while but there is definitely a chemical reaction and you will see the rust appear before your eyes.

After my rust appeared (I waited over night to make sure all the rust had come forth), I mixed the Permacoat Supreme, which is a final top coat, with 50 percent water, in other words, half water and half Permacoat. I applied it with a small chip brush. When this step dried, I applied the Permacoat full strength. The label does say Interior/Exterior so I'm sure you could leave your project outdoors, but since my projects were papermache, I intended them for indoor use only.
Since I acquired my letters from a yard sale, I only had a few letters to choose from, but I had a lot of fun making them into words.
This finish is perfect for fall decorating, don't you think? I have to say, and this is my sincere opinion, that I have tried about four different product lines from Modern Masters and they all do what they promise to do. This company knows how to manufacture artist's supplies, and they have been around a very long time.
Thanks for taking a peak and, thank you, Modern Masters, for letting me have loads of fun with your Metal Effects rust finish.
I may be partying at...
Mondays Le Chateau des Fleurs The Graphics Fairy
Between Naps on the Porch Metamorphosis Monday
Tuesdays Knick of Time Coastal Charm
Boogie Board Cottage A Stroll Thru Life
Cozy Little House Tweak it Tuesday
Wednesdays Savvy Southern Style
Thursdays The Shabby Creek Cottage No Minimalist Here
Between Naps on the Porch Tablescape Thursday
Rustic Restorations Homespun Happenings
Fridays French Country Cottage My Romantic Home Miss Mustard Seed
Potpourri Friday Common Ground
The Charm of Home Rooted in Thyme
Saturdays Funky Junk Interiors
Sundays


.JPG)


10 comments:
Those turned out great, Maggie. I have used their products in the past,too, and been very pleased with the results. I used their verdi treatments on some light fixtures and loved them. xo Diana
Love your rust projects! Thanks for letting us know that JoAnn's carries the letters. Lynda
Maggie, this turned out great. I have always wanted to try this product. I think I will be trying this out when we are finished and start building our new home!
Cynthia
Pinned.
These are just too cute and what a score to find those letters at a yard sale.
What a fun product and you sure did a great job with your letters because they look just like metal! Way to go on scoring some free fun stuff!
This is crazy cool, I remember when you posted about them before..I have so got to try this!!!
Carol
Maggie, You just have the knack...those letters are so cute. I love that rustic look. xoxo,Susie
How in the world have a missed Little Miss Maggie. I don't know what is going on with my blog these days.
You are so absolutely creative! I love the letters and may have to try my hand at this, although I'm sure my crafty can not compare with yours.
Will continue to visit when this sham of a computer allows.
Happy Day,
Bonnie
Wonderful! Very natural looking!
Post a Comment