To start off, I used a large pretty red and white toile paper plate that I had on hand. Sometimes I pop into Tuesday Morning or Walmart just to see what pretty paper goods they have on hand. These are the most inexpensive places I have found for paper goods besides the 99 Cent Store, and I like to keep pretty ones on hand in case we want to have a light impromptu snack on the patio. This one was perfect for my project. I used one of my custard cups and traced four circles so I could make four roses. I cut out one of the circles. This will be the base of your flower. If you are going to use these for gift ties you can punch holes and string ribbon or use double-sided tape. I glued the petals onto the white side of the circle so the under side would still be pretty for whatever you use the rose for.
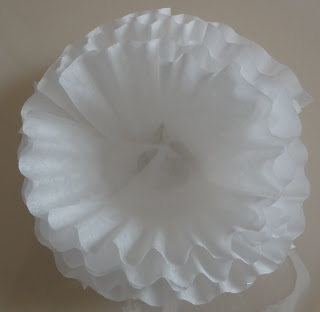
I use a glue gun for this type of project simply because Tacky Glue takes way too long to dry. For this project I used only the white coffee filters. Cut them in quarters. Your first layer will consist of 5 quarters placed in a circle slightly overlapping each other. Next take 5 more quarters and place them on top of the first row. Always stagger your petals (quarters) as nature doesn't put any petals one on top of the other. I also usually work in odd numbers of petals. 3s and 5s work best.
After you place the second row of petals which consists of 5 petals, now you will do two more layers one on top of the other but this time you will do 3 petals per layer. Keep slightly overlapping. If you refer back to my original roses in November I used the brown and the white filters. Thus the rows had variations of color. If anyone would like to point me to a tutorial on how to insert the link to my other roses, please feel free to do so (Please, pretty please. Haven't figured it out yet on my own.)
Now I cut out my kinda square heart shaped petals from book pages. They are about 5 inches wide and no longer than the coffee filters. Refer to my other post. It's one of my most popular posts so you can probably find it on my side bar. Continuing on.....sort of pleat the bottom of the petal to get it to curve like a petal would You will need 5 of these book page petals. For this layer you are going to pleat the bottoms of 4 of the petals and glue them in place like I did in the picture. See the glitter bordering the petal? That is white iridescent glitter. I did this step with the Tacky Glue ahead of time and let them dry while I was getting the supplies out and gluing the first layers.
Below you will see for this step I only used 4 petals but I still staggered them a little bit.
Now for the red. Last year I purchased these pretty red napkins at a specialty store. The color was perfect for my application today. I used my pattern that I used for the book pages. To describe it a little better, because I forgot to photograph the flat petal, think of it as a heart.with the pointy part cut off. That will give you the proper shape.
The red napkin layer rests right on top of the book page layer but remember to stagger it. Each layer builds upon the other and that's what gives the rose its fullness. I took the fifth book page petal and rolled it up and glued it in a circle. I took the bottom half inch of the petal and pressed it flat and glued that part down into the center of all the other layers. Now it wanted to lean a little bit so I took approximately 6 more white petals aka coffee filter quarters and glued them around the center book page petal. At this point, to avoid getting glue all over your other already placed petals, point your glue gun down into the flower and then stick the petal in. Keep going around and around your center petal until you achieve the desired look you want. By the way, I kept a wood skewer on hand to help with stuffing the final petals down into the glue. Hopefully this will eliminate a few burns. I have photographed a couple of the finished rose from different angles. I love these for Valentine's Day. Happy crafting and if you enjoy my blog, I love followers. Have a wonderful day!


2 comments:
Very pretty I pined them
What a gorgeous little bouquet! Love the great pics and easy to follow directions. I'm inviting you to share at our WIW link party, we'd love to have you!
Hugs,
Patti
Post a Comment