skip to main |
skip to sidebar
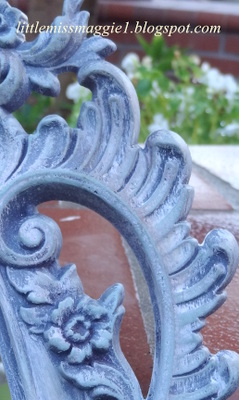
This was the third of three faux zinc makeovers I have done thus this is my final project. The first one was Chef Pierre and then I did the faux zinc lamps this week as well. For this project I did not use wax to seal the project. The mirror was originally painted purple. No, that wasn't the original color, but someone painted it purple, but I loved the ornateness of the frame and bought it anyway.

I sprayed it with primer gray which no matter what color I was going to paint the mirror, it had to be primered to cover the purple which by the way bled through a little bit, but just a tad. I washed it down with gesso and wiped it back, then I came back with the Duck Egg Blue chalk paint and dry brushed here and there. I took my acrylic glaze medium (found in the acrylic paint section of your craft store) and mixed it with the burnt umber acrylic paint. I used a ratio of three to one, one being the burnt umber. I used a wet brush, dipped it in the glaze and dabbed here and there on the details of the frame so it would appear "dirty" in the crevices.
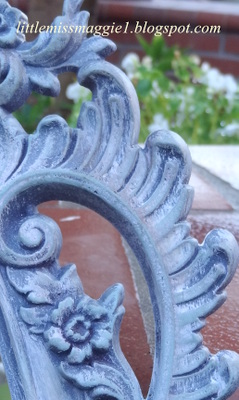
After the mirror sat and cured for awhile, I sprayed it with Deft lacquer spray to seal it all in. I did remove the mirror from the frame when I did all of this so the back side got done as well. This will be my final zinc-like project for awhile. First I need to see if this finish will sell in our venue. If it does, I will experiment with it some more.
Hope your week is going great. Thanks for dropping in.

 I'm partying at...
Mondays Le Chateau des Fleurs The Graphics Fairy
Between Naps on the Porch Metamorphosis Monday
Tuesdays Knick of Time Tutus and Tea Parties Coastal Charm
Boogie Board Cottage A Stroll Thru Life
Cozy Little House Tweak it Tuesday
Wednesdays Savvy Southern Style Ivy and Elephants
Faded Charm Cottage Fine Craft Guild
Thursdays Embracing Change The Shabby Creek Cottage No Minimalist Here
Between Naps on the Porch Tablescape Thursday Fishtail Cottage
Rustic Restorations Homespun Happenings
Fridays French Country Cottage My Romantic Home Miss Mustard Seed
At the Picket Fence Potpourri Friday Common Ground
The Charm of Home Decorating Insanity Rooted in Thyme
Saturdays Funky Junk Interiors
Sundays My 1928 Charmer Sunday's Best
One of my daughter's favorite paper stores is the Paper Source. It's a chain, and I'm not sure if they are nationwide or not. Even though I live in a suburb of Los Angeles, the closest store to me is 30 miles away. The last time I stopped in there I signed up for their emails, and somehow they also have my address which I must have given them as well. Yesterday I received their catalog in the mail. They have a website as well. It's www.paper-source.com. I took a couple of photos from the catalog to share with you just in case you are not familiar with the wonderful ideas they have to share.
The first thing that really grabbed my attention when I was flipping through the catalog was this paper map dress. I think this would be a great window display for a vintage clothing store or antique mall. I could just imagine a window done in map blouses, dresses, pants, etc., just hanging in a window. Very eye catching. Almost reminds me of Anthropologie. Don't you agree?
Since I like to paint signs, I saved the pages with the different typography designs. I love these examples.
Isn't this little sign above adorable? I think this could be done using Graphics Fairy images. She's had several circus images that I have fallen in love with. The catalog lists the "big deal" sign for $21.95 for a 12" x 16". On the following page, I spotted the candy corn banner. Too cute. The garland is 10 feet long and is $10.95. By the time I would buy all the supplies, I would have spent more than that at the craft store! If any of these things interest you, check out their website. They have wonderful things to spark your creative juices.
Thanks for stopping by. I hope to have a project done soon of a musical persuasion.
I'm partying at...
Mondays Le Chateau des Fleurs The Graphics Fairy
Between Naps on the Porch Metamorphosis Monday
Tuesdays Knick of Time Tutus and Tea Parties Coastal Charm
Boogie Board Cottage A Stroll Thru Life
Cozy Little House Tweak it Tuesday
Wednesdays Savvy Southern Style Ivy and Elephants
Faded Charm Cottage Fine Craft Guild
Thursdays Embracing Change The Shabby Creek Cottage No Minimalist Here
Between Naps on the Porch Tablescape Thursday Fishtail Cottage
Rustic Restorations Homespun Happenings
Fridays French Country Cottage My Romantic Home Miss Mustard Seed
At the Picket Fence Potpourri Friday Common Ground
The Charm of Home Decorating Insanity Rooted in Thyme
Saturdays Funky Junk Interiors
Sundays My 1928 Charmer Sunday's Best
I purchased these two French chairs from a friend of mine. They had a goldish-striped fabric that was in excellent condition and the finish on the chairs was wood. I really didn't want to get into the expense of recovering them if I could sell them the way they were. They were a little too traditional and dated so they did not sell and I brought them home and there they sat.
Do you see a pattern here with my last few posts? Not everything a dealer takes to her space sells for whatever reason. Right now I am trying to clear out old inventory by reinventing it so I can justify buying more. I need the space in my work room for new projects so my philosophy must be "out with the old." I try to only buy items that "speak to me." They must have good bones to begin with or they don't come home with me. These two chairs are the perfect example.

Here was my "fix" for these chairs. I masked off the wood part and carefully painted the wood with Rustoleum's Canyon Black brush on. Then I carefully sealed it with Deft Spray lacquer being careful to shield the fabric with a newspaper. When the tape was removed, the goldish fabric now had more of a burlap tone next to the black paint. Now, the photos of the chairs could have come out better and I think I should have cut out the inside of the transfer paper but I will tell you, the middle section of the image transferred clear and you can still see the stripes of the fabric through the transferred image. This next photo was my practice run on simple plain fabric.

Now I'll explain the transfer paper I used. Normally I use Avery light transfer paper on my dish towels, but I wanted to give this new paper a try. It's by Lesley Riley and it's called Transfer Artist Paper or TAP. It can be used on wood, fabric, and all sorts of surfaces. The first packet I bought was 5 sheets for 12.95. Ouch! But I wanted to give it a try. It does give a more crisp, darker image on the transfer so I like it a little better than Avery's. I can't wait to try it on other surfaces and it also transfers in color too. The best part for me is it can only be used with an ink jet printer so no hassle getting a laser copy. By the way, the image is from Graphics Fairy. I'll include the image here.
I'm happy to tell you I just ordered an 18 pack of the paper from Amazon and it was only $26.37. That brings the cost way down. The directions were easy and I will be a repeat customer.
Have a great week and thanks for visiting.
I'm partying at...
Mondays Le Chateau des Fleurs The Graphics Fairy
Between Naps on the Porch Metamorphosis Monday
Tuesdays Knick of Time Tutus and Tea Parties Coastal Charm
Boogie Board Cottage A Stroll Thru Life
Cozy Little House Tweak it Tuesday
Wednesdays Savvy Southern Style Ivy and Elephants
Faded Charm Cottage Fine Craft Guild
Thursdays Embracing Change The Shabby Creek Cottage No Minimalist Here
Between Naps on the Porch Tablescape Thursday Fishtail Cottage
Rustic Restorations Homespun Happenings
Fridays French Country Cottage My Romantic Home Miss Mustard Seed
At the Picket Fence Potpourri Friday Common Ground
The Charm of Home Decorating Insanity Rooted in Thyme
Saturdays Funky Junk Interiors
Sundays My 1928 Charmer Sunday's Best
Everyone has a week every now and then that just turns out to be an exercise in futility, and I am no different. Thank goodness these weeks only come along about once a year. This first photo is a pretty cute medicine cabinet. It was plain pine from the 80's and was missing the glass. I asked my husband to paint it black and put some small scale poultry wire in the front. He did all the work on this so I'm going to quit while I'm ahead and not touch it anymore. I'll take it to the shop tomorrow.
So what did I do with my week? I started early Monday morning trying to remove the glass from this 5 foot square window so I could hang it on my wall at the shop. I thought someone could make an awesome chalkboard out of it if the glass was removed. I broke out the glass panes as I usually do and in the process banged my hand. That didn't deter me though. I spent at least 8 more hours this week trying to get all the glass removed!
In 8 hours' time I can do a lot of DIY projects, get them photographed and then blog about them, but I met this window as a challenge. The front is white chippy paint with the old green showing through.
Pretty cool to use on a wall at my space at Aubergine Emporium, don't you think? But check out the next photo. This was the back side. I couldn't get the glazing compound out and therefore the glass around the edges stayed stuck! It's still not perfect on the back side, but all the glass has been picked out of the crevices and I shall use the front side for my display. In many years I have never encountered glazing compound that didn't just fall away. Has anyone out there had this same problem?
Then I decided to try my wood burning tool to transfer an image on to this wooden box. That didn't go well either. I think I blew the image up too large and didn't have enough of a solid image to transfer.
Not to worry, I will ask my husband to paint it and I will paint something of my own. Until then, I will try the transfer method on something else and let you know how it turns out. Next week will be better. I'm attending my favorite flea market tomorrow and I just know I will find something to inspire me for next week's projects. I hope your week was not as frustrating as mine. Thanks for stopping by.