Friday, November 25, 2011

Historic Claremont Hotel in Berkeley, California


We are traveling up north to visit our daughter for the Thanksgiving holiday.  We are staying overnight in Berkeley, California at the historic Claremont Hotel.  I love historic hotels.  You can feel the history, and wonder who walked the same floors as yourself a hundred years ago.  This beautiful hotel is a landmark to the area and it is no wonder.  In the lobby of the hotel stands this approximate 5 feet tall gingerbread village.
 It is breathtaking.  The facade of the house is Hershey's chocolate bars, ginger snaps, and frosted mini wheats.  The length of this project takes up almost the length of the lobby.  That is a full size Christmas tree to the left of the project.  That should give you an idea how large it is.
 This gingerbread village is a replica of the Claremont Hotel itself. 
It is such a sweet sight.  It's a constant backdrop of many family photos.
 We snuck a peak at the buffet they were serving for Thanksgiving, and it was another beautiful sight.   Although we did not eat our dinner here, I wanted to check it out.  I knew it would be something special.  Below is a mini palm tree they have used to serve fruit skewers at the fruit bar.
 The next photo was of the seafood buffet.  This is a turkey made from fruit kabobs.  Everything here is on a grand scale.  My daughter did some very artsy photography today of the hotel.  I am going to try to get a few of her photos to share with you.  Tomorrow we are off to Napa.  I will be sharing more of the California scenery.

Thursday, November 24, 2011

Christmas Graphics

Happy Thanksgiving.  Today is a travel day for us for the Thanksgiving holiday.  I hope everyone is having a wonderful day with family and friends.  There are so many things I am thankful for and I believe it is always best to live in the spirit of gratefulness and not just when things are going well.  I saw a billboard yesterday that said "Count your blessings, not your problems."  I like that..  Terrific words to live by. 

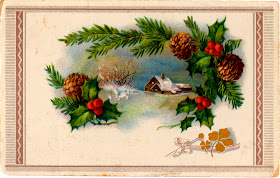
I have gone through some of my graphics and found these wonderful images that I wanted to share.  I love the first one especially and the frame at the bottom of this post is so intricate and beautiful.  I have many lovely frame graphics, but this one is unusual.  It is from an old Spanish book plate.
This Christmas Rescue card may become the subject of a sign one day.  I am going to try to use my art projector and do something clever.  Anyone got any ideas for a subject matter?  She is holding pies.  He is wearing a rain slicker.

Wednesday, November 23, 2011

Glitterfest Roses from Book Pages

One of my fellow dealers at Aubergine Emporium brought in two beautiful wreaths adorned with roses made from coffee filters.  She sort of explained to me how she did them so I tried to duplicate the process  only mine have some book pages inserted into the rose and I outlined the book petals with  silver glitter.  Unfortunately you cannot see the glitter in the photos.  Unlike my Poinsettias from the Page project, these roses take between 5 to 10 minutes to assemble and I literally made them from things I had in the house.
 Small white paper plates would have been better, but I had none on hand so I took a dinner size paper Christmas plate and cut the rim off and then cut the circle in quarters to make a back for the rose.
 I used the coffee filters to come up with a pattern for the book page.  The coffee filters are cut into quarters so I tried to make the width of the book petal as wide as the widest part of the quartered coffee filter.  Then instead of making it a triangular shape like the coffee filter section, I made a wider base as shown in the photo.  I cut a little dip in the shape because rose petals are not perfectly straight across.  I outlined one side of the page petal with Tacky Glue and dipped it in silver glitter.  I used German glitter I bought from an Etsy shop.  It has a slight antique tarnished silver look.

 Each rose needs 5 of these glittered petals.
I used white and brown coffee filters and cut them in quarters.  You can cut a whole bunch at one time and separate them into a pile of white and brown petals.  I started with 5 pieces of the white slightly overlapping the edges of each petal as I went in a circle.  I used one of the quarter pieces of the paper plate as my base for this project.  Now figure out how high you can count and that's how many hot glue sticks I used.  Seriously.  I used one after another after another and so on.  So lay down 5 white petals in a circle using a hot glue gun.  It just takes too long to use Tacky Glue for this part. 
 Now on top of that use 5 brown quarters and do exactly the same thing.
 When that was done, I took 3 white petals and placed them in a circle on top of the the brown layer.  Then I took 3 brown petals and placed them on top of the 3 white petals kind of placing them in between.  So now you have the plate quarter as your base and 4 layers of coffee filter petals.  Understand?  Now take the book page petals and fold just the base of the petal and sort of pleat from each side in.  If you saw my poinsettia project it is very similar except we are not using tape.  I pleated or gathered the base of the petal scrunching it in at the bottom of the petal.  I stuck a glob of hot glue down and then using a thick wood skewer, I took the flat end and tamped it down after I placed the petal in place.  Put down 4 book petals for this layer.
 On top of that layer, I put 3 more brown petals always working in a circle.  On top of the brown layer place 3 white petals.  When I am saying petals, I mean the coffee filter quarters.
 Now take your fifth book page petal and roll it up with the glitter side on the inside of the roll.  Scrunch the bottom and make a little fold.  Use the folded part to make your flower center stand straight up in the center of the flower.  In other words, your flower center will have an L-shaped base.  Glue that flat part of the L-shape into the center of the flower.  Put another glob of glue in the middle of your flower petals and tamp your rolled up page petal into the center.


 When that has been placed, take 3 more brown petals and drizzle some glue down into the base around the page petal and stuff the brown petals in.  Then do this again with 3 white petals.  DO NOT put the glue on the petal before you place it.  You will mess up the layers you have already done.  Just drizzle glue into the flower aiming for the inside base of your last completed layer.  Tamp it down with the wood skewer.  As you get to the last layers it is getting tighter and tighter in the center so as you place the glue and stuff the petals in you are not going to see the glue spots.  They are hidden by the stuffing procedure you are doing.  But the glue will hold the petal in place.  Here is one of my finished roses.  Believe me, it takes longer to read this tutorial than it did to make a rose.  Once you start moving on this project it goes very fast.
 Here is a photo of the wreath that Debbie brought in that inspired me to do this project.  I love the glittered bird.  She made little streamers with the coffee filters and rolled up book pages and placed them behind the rose.  For her flower centers, she pleated narrow strips of book pages and glued them into the centers.  On the original rose I made I did the petals around a wooden dowel and built the rose up in the same way.  Doing it this way, you could stick the roses into the tree branches of your Christmas tree, but the way I did it here for you, you could use a hole punch and punch holes in the paper plate base and run ribbon or string through the base and make a gift box tie and use that instead of a ribbon bow.

I will be participating in the following link parties today.


Funky Junk's Saturday Nite Special


Tuesday, November 22, 2011

Christmas Window at Aubergine Emporium

I just thought I would try to get everyone in the spirit by showing off the fabulous windows Pat did at our shop, Aubergine Emporium.  She always does such a great job with one traditional window and one that is a little off the wall.  Now before you get upset about painting the instruments white, these were basically unusable instruments.  They were dented and dinged and some were missing parts.  Pat painted them white and now she can use them for displays all year round.  I love the dog listening to the music.  So creative!
 The next window is a little more traditional with its winter scene.  At times these windows have been known to literally stop traffic.  I can't wait till the whole store is decorated with more wonderful ideas.  I will be sharing these with you very soon.

Monday, November 21, 2011

Vanity turned Night Stand

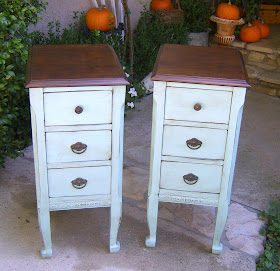
For a while there at the shop people were looking for vintage and antique vanities.  I found one on Craigslist and bought it just because people were looking for one.  Now in the past I have always shied away from this type because it doesn't go straight across and there is no surface space.  I should have followed my gut instincts.  In the past when I find this type of vanity with the mirror missing or in not too good a shape, I have had my husband take them apart and make night tables.  They are a great height and people usually love them.  That is eventually what happened with this one.
 This vanity had bat wing mirrors, and that is probably what lured me in.  I have a thing for this type of mirror.  The mirror was in great shape.  Also the vanity was in very good condition and still had the original hardware.  Well, I had the vanity in my space at Aubergine Emporium for about a year and it wasn't getting much interest.  By the time I put two lamps on it, that took all the surface space it had.  So I thought it was time for a re-do.
 I brought her home and told my husband to get to work.  He carefully removed the mirror which I still have.  Does anyone have any ideas for that?  Off to work I went leaving this piece in Steve's capable hands, or so I thought.
I returned home and there sat the vanity intact.  Notice anything?  I have never had this happen on the other similar projects we have tackled.  This vanity only had six legs.  When he tried to separate them, the sides would not stand on their own.  Off to Lowe's he went looking for leg material.  He measured the legs so they could be duplicated.  Thankfully this piece did not have any curves to the back legs so it was a relatively easy fix.  He drilled three dowel holes in each new leg and dowled it into the vanity for extra strength.  I probably would have used L-brackets, but since Steve is a perfectionist he explained to me he was doing it the "right way."
 We left the tops in wood. because they were in great shape.  However, the wood finish on the bottom wasn't doing much for me and this is not necessarily an antique vanity, although it is certainly vintage.  I decided the two new night tables needed a little paint.  Now when you separate a vanity like that and remove the shelf in the middle, it leaves either marks or grooves in the sides where the shelf was attached.  Notice on the table on the left the molding is on the bottom.  That was original to the vanity.  That was the outside.  On the night table on the left where the groove was left from removing the shelf, Steve matched the molding as closely as he could and placed it over the groove and holes left from removing the shelf.  Once it was all painted, you can't even tell.
 
After painting the two halves, I shabbied them back with my Mouse Sander just a bit to add a little age and put a light coat of Minwax Jacobean stain and then wiped it back quickly.  I just wanted to add a little patina.  We re-installed the original hardware and now I have something I hope will be more practical.
I hope I can get the link to Miss Mustard Seed's Link Party on Friday, December 2.  If I cannot copy the link, here is the link to her blog   http://missmustardseed.com/.  Thank you, Miss Mustard Seed, for hosting you Furniture Friday Link Party!

Sunday, November 20, 2011

Vintage Grocer Card Revised

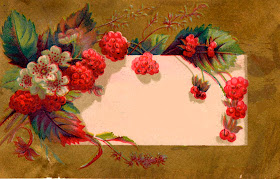
I woke up yesterday morning and it was pouring rain so I did not go out on my normal Saturday rounds.  I decided to play with the computer instead.  On Friday I posted an old graphic of a grocer's business card.  The colors in this graphic are beautiful and great for the holidays.  I saved a copy of it and renamed it.  Then I went to "The Paint" area of my picture file.  I successfuly eliminated the print on the card.  I thought this card would make beautiful gift tags for the holdiays.  Now I just need to figure out how to put print back on it.  For those of you who know how to put print back on in Photoshop I am re-posting this new version of the card with a blank space.  As soon as I get good at this, I will post a tutorial on how to do it.  I find things all the time and wish the printing wasn't there so I could re-purpose the image.